Running a Nanit Pro with Starlink internet in a remote cabin nursery works well in 2026, but it requires a few setup tweaks to handle Starlink's variable latency, brief satellite handoffs, and shared bandwidth. The short answer: plug the Nanit camera into a dedicated 2.4 GHz Wi-Fi band on your Starlink router, keep the camera within 25 feet of the router, set the Nanit app to auto-quality, and pair it with a no-Wi-Fi backup monitor for the rare moments Starlink blips. This guide walks through every step — bandwidth, placement, power planning, and which backup monitors make sense when you're off-grid with a baby.
Why Nanit Pro and Starlink work together at a cabin
Top Picks


Starlink Standard and Mini kits both deliver 50–200 Mbps download and 10–25 Mbps upload in 2026, which is more than enough headroom for the Nanit Pro's adaptive 1080p stream. The Nanit needs roughly 2 Mbps sustained upload to feed your phone in HD and about 0.5 Mbps for the lower-quality fallback. Starlink's typical 25–50 ms latency to nearby ground stations is also low enough that the Nanit app feels responsive — you'll see your baby with about a one-second delay, comparable to a city fiber connection.


The honest catch: Starlink is not landline-stable. Satellite handoffs cause sub-second packet loss every few minutes, and obstructions (snow, branches, the cabin roofline) cause longer dropouts. A Wi-Fi-only smart monitor like the Nanit will briefly reconnect — usually within 5–10 seconds — but during overnight feedings that pause can feel like an eternity. That's why every cabin nursery setup we recommend uses a hybrid: a smart camera over Starlink for analytics and remote viewing, plus a local radio-frequency monitor for guaranteed audio.
Step-by-step: Nanit Pro setup on Starlink
1. Pick the right Starlink hardware
For most cabins, Starlink Standard (the rectangular dish) is the right choice — it has better gain and uses less power than Starlink Mini in continuous-use scenarios. Mini works if you're truly off-grid on solar, but its narrower antenna pattern means more obstruction-related dropouts in forested sites. Mount the dish with a clear 100-degree northern sky view (in the northern hemisphere) and run the cable to your router on the same floor as the nursery if possible.
2. Configure your Wi-Fi for Nanit
Nanit Pro connects on 2.4 GHz only — it won't see a 5 GHz network. The default Starlink router broadcasts a combined 2.4/5 GHz SSID. Open the Starlink app, go to Settings Wi-Fi, and either split the bands into two separate SSIDs or enable Bypass Mode and use your own router (a TP-Link Deco or Eero mesh works well). Splitting the bands prevents the Nanit from trying to roam to 5 GHz and dropping. Name the 2.4 GHz network something like "CabinNursery-24" so you remember which one to join during setup.
3. Position the camera and stand
The Nanit Pro floor stand puts the camera roughly 53 inches above the crib for the signature full-room overhead view. In a cabin, watch out for log-wall RF absorption: thick chinked logs and metal roofing can cut Wi-Fi signal in half. Keep the Starlink router within 25 feet of the camera, ideally in line of sight or with at most one interior wall between them. If the nursery is on a different floor than the router, add a 2.4 GHz mesh node in the hallway just outside the nursery door.
4. Tune the Nanit app
Inside the Nanit app, go to Camera Settings Video Quality and select "Auto" rather than locking to HD. Auto downgrades to 480p when upload bandwidth tightens — useful when Starlink is sharing your link with streaming services. Enable Background Audio so the audio stream keeps playing on your phone if you switch apps. Turn on sleep analytics only if you actively want them; they upload more data continuously.
Bandwidth math for the off-grid nursery
A continuous 1080p Nanit feed pulls roughly 2 Mbps up and 0.3 Mbps down for the control channel. If two parents both watch from phones, double the upload to about 4 Mbps. Add a second smart device — say, an Owlet sock that uses ~0.1 Mbps — and you're at 4.5 Mbps of dedicated upload. Starlink Standard's 15–25 Mbps upload easily covers this even with backup cloud sync, video calls, and 4K Netflix (which only consumes download). The bottleneck is almost never throughput; it's continuity.

If your cabin has a metered Starlink plan (Roam Unlimited or Residential Lite in 2026), watch the data. A 24/7 Nanit feed at HD consumes roughly 20 GB per day of upload, which can add up if you're paying overage fees. Switch to motion-triggered recording in the Nanit app to cut that to under 2 GB per day.
Power outage and Starlink dropout planning
Starlink draws 50–75 watts on average, the router another 15 watts, and the Nanit Pro about 5 watts. Total: ~100 watts continuous. A 1 kWh LiFePO4 battery (the size of a shoebox) gives you 10 hours of total cabin-nursery uptime — long enough to cover most blackouts and overnight grid drops. Wire Starlink, the router, and the Nanit to a single UPS or solar battery so they all stay alive together. A camera that stays on while the router is dead is useless.

For the moments when everything fails — power, internet, or both — you need a non-Wi-Fi backup. See our no-Wi-Fi baby monitor guide and our Starlink smart-home setup tips for the full off-grid blueprint.
Top picks for the remote cabin nursery in 2026
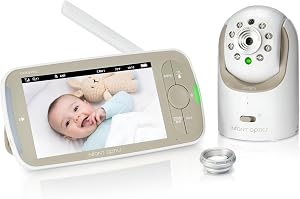
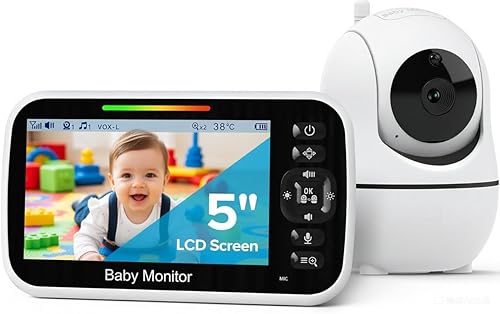
Best smart monitor: Nanit Pro Smart Baby Monitor
The Nanit Pro Smart Baby Monitor with Floor Stand is the camera this guide is built around. The overhead crib view, breathing-band detection, and sleep insights all work over Starlink as long as you follow the 2.4 GHz setup above. The floor stand is critical — it avoids the wall-mount drilling that log cabins make awkward, and it folds down for travel between your primary home and the cabin.

Best off-grid backup: HelloBaby No-WiFi Monitor
For inevitable Starlink dropouts, you want a direct radio link that doesn't touch the internet. The HelloBaby No-WiFi Baby Monitor uses FHSS radio between the camera and a dedicated 5-inch parent unit, with a 30-hour battery on the handheld and PTZ controls. Pair it with the Nanit and you have full redundancy: Nanit for analytics, HelloBaby for guaranteed audio and video when satellites blip.
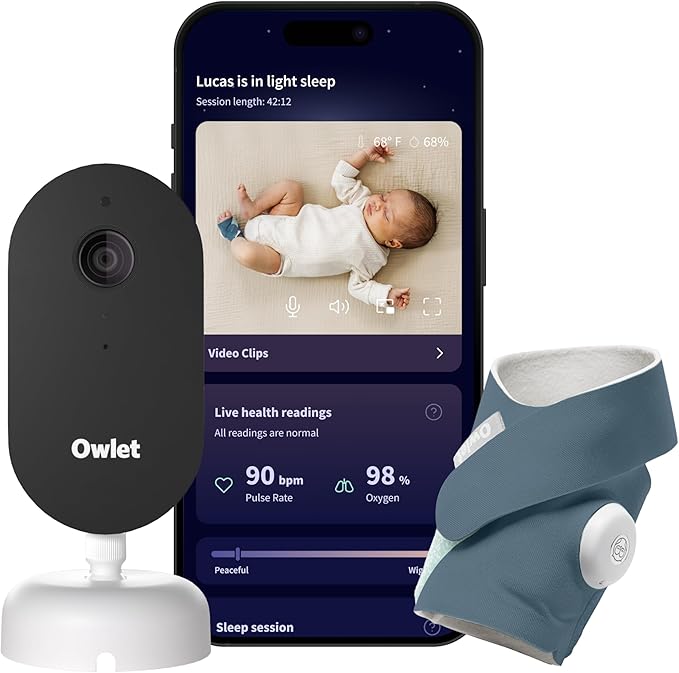
Best wellness add-on: Owlet Dream Duo (Gen 3)
If you want SpO2 and heart-rate tracking on top of Nanit's sleep analytics, the Owlet Dream Duo (Gen 3) Smart Baby Monitor combines a 2K HD smart camera with the Dream Sock. Worth noting: Owlet also requires 2.4 GHz Wi-Fi, so add it to the same split SSID as the Nanit. The sock talks to the base station over Bluetooth and falls back gracefully when Starlink hiccups — alerts cache locally and push as soon as the connection returns.
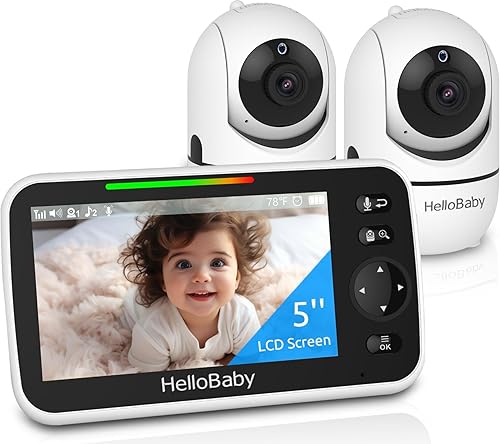
Best second-room option: HelloBaby 5-inch with 2 Cameras
Cabins often have an extra bunk room or a nap area. The HelloBaby 5-inch Baby Monitor with 2 Cameras covers two rooms on one parent unit, with split-screen view and no internet required. It's also our go-to for grandparent or babysitter handoffs — they don't need your Starlink password or the Nanit app to keep watch.
Best budget no-Wi-Fi: GoodBaby PTZ Monitor
If the Nanit Pro is your primary and you only need a thin backup, the GoodBaby Baby Monitor with Camera and Audio is the cheapest reliable PTZ no-Wi-Fi option in 2026. The camera runs on wall power and the parent unit on a rechargeable pack, which keeps your UPS load minimal.
Comparison table: cabin nursery monitors
| Monitor | Needs Wi-Fi? | Resolution | Parent-unit battery | Best role at the cabin |
|---|---|---|---|---|
| Nanit Pro | Yes (2.4 GHz) | 1080p | Phone-based | Primary smart camera |
| Owlet Dream Duo (Gen 3) | Yes (2.4 GHz) | 2K HD | Phone-based | SpO2 + camera combo |
| HelloBaby No-WiFi | No | 720p | 30 hours | Starlink-outage backup |
| HelloBaby 2-Camera | No | 720p | 30 hours | Two-room coverage |
| GoodBaby PTZ | No | 720p | ~12 hours | Budget backup |
Final cabin-setup checklist
Before your first overnight with a baby at the cabin: confirm your Starlink dish has a clear sky view, split the router into 2.4 and 5 GHz SSIDs, run a 24-hour speed test to log dropouts, wire Starlink+router+Nanit to a UPS or battery, place a no-Wi-Fi backup monitor in the room with fresh batteries, and test the Nanit app from a phone using only cellular to make sure it streams. Following this Nanit Pro with Starlink internet workflow, you'll have city-grade smart-nursery coverage in the woods. For deeper tuning, see our baby monitor bandwidth guide.
Frequently Asked Questions
Does Nanit Pro work without internet at the cabin?
No — Nanit Pro requires an active Wi-Fi connection with internet for both setup and viewing. The app routes through Nanit's cloud, so a fully off-grid setup with neither Starlink nor cellular won't work. Use a HelloBaby or GoodBaby radio monitor for purely offline use.
What Starlink plan do I need for a baby monitor?
The cheapest Starlink Roam or Residential Lite plan in 2026 handles a single Nanit stream easily. If your cabin sees multiple streamers or video calls, step up to Standard. Avoid the strict data-capped travel-only plans if you plan 24/7 monitoring.
Will Nanit's breathing detection still work over Starlink?
Yes. Breathing-band detection runs locally on the Nanit camera using the chest sticker; only the alert and analytics upload through Starlink. Even if Starlink drops, the camera still detects motion — you just won't get the phone alert until the satellite link returns.
How do I keep the Nanit running during a cabin power outage?
Wire the Starlink dish, router, and Nanit camera into a single UPS or LiFePO4 battery. A 1 kWh battery gives roughly 10 hours of full uptime. Skip gasoline generators near the nursery — exhaust risk and noise outweigh the convenience.
Can I use Starlink Mini instead of Standard for the nursery?
Yes, but expect more dropouts. Mini's smaller antenna handles obstructed skies less gracefully, which matters more in forested cabin sites. If Mini is your only option, prioritize a no-Wi-Fi backup monitor and place the dish on the cabin's tallest clear point.
Why does the Nanit app keep disconnecting on my Starlink?
Most often it's the dual-band SSID. Nanit insists on 2.4 GHz and will fight a network that pushes it to 5 GHz. Split the bands in the Starlink router app and rejoin the camera to the dedicated 2.4 GHz network. Persistent disconnects after that usually mean dish obstruction — check the Starlink app's obstruction report.
Is it safe to rely on a smart baby monitor in a remote cabin?
Only when paired with a no-internet backup. Starlink is reliable but not infallible, and "remote cabin" means a slower emergency response if something goes wrong. Always run a Nanit Pro with Starlink internet plus a local radio monitor like the HelloBaby — two independent systems give you the redundancy a single connected device can't.
Key Takeaways
- Choosing the right Nanit Pro with Starlink internet means matching capacity and output ports to your actual devices
- Always check actual watt-hours (Wh), not just watts — runtime depends on Wh, not peak output
- Also covers: Nanit Pro Starlink setup
- Also covers: baby monitor satellite internet
- Also covers: Nanit cabin nursery wifi
- Compare price-per-Wh across models to find the best value for your budget